
Codex CLI
This page focuses on the terminal-based Codex CLI. If you use ChatGPT desktop app, the Codex client, or an IDE extension, read the Codex/ChatGPT guide instead.
TIP
Recommended path: create getapi.one and getapi.pro as separate OpenAI-compatible providers in CC Switch. If you prefer a CLI-only setup, add both providers to Codex config.toml and keep API Keys in environment variables.
For desktop and IDE workflows, go to Codex/ChatGPT.
Download and install
CC Switch
Install CC Switch first if you want one visual place to manage and switch GetAPI provider configurations.
| Client | System / scenario | CDN download | Fallback |
|---|---|---|---|
| CC Switch | macOS | Download | GitHub Releases |
| CC Switch | Windows | Download | GitHub Releases |
| CC Switch | More versions | — | GitHub Releases |
Install Codex CLI
OpenAI official Codex CLI installer command:
curl -fsSL https://chatgpt.com/codex/install.sh | shIf the installer script is unavailable in your environment, use the OpenAI official Codex CLI documentation as the source of truth for alternate installation methods.
Before you start
- Codex CLI is installed and the codex command works in your terminal.
- CC Switch is installed, or you are ready to edit the Codex config file manually.
- Complete GetAPI sign-up and login. If you have not done that yet, start from the sign-up and login overview.
- Create a GetAPI API Key. If you have not created one yet, read the API Key overview.
- Decide whether this CLI session should use getapi.one or getapi.pro.
- Prepare the exact model name you want Codex CLI to use.
Choose a GetAPI service
Keep each API Key paired with the Base URL from the same service. For Codex CLI and CC Switch, the Base URL must include /v1. Do not mix a getapi.one key with the getapi.pro relay address, or the other way around.
| Service | Codex Base URL | API Key source | API Key guide |
|---|---|---|---|
| getapi.one | https://www.getapi.one/v1 | getapi.one API Keys | API Key guide |
| getapi.pro | https://relay-api.getapi.pro/v1 | getapi.pro API Keys | API Key guide |
Configure with CC Switch
1. Open CC Switch
Launch CC Switch first and prepare to enter the Codex provider configuration area.
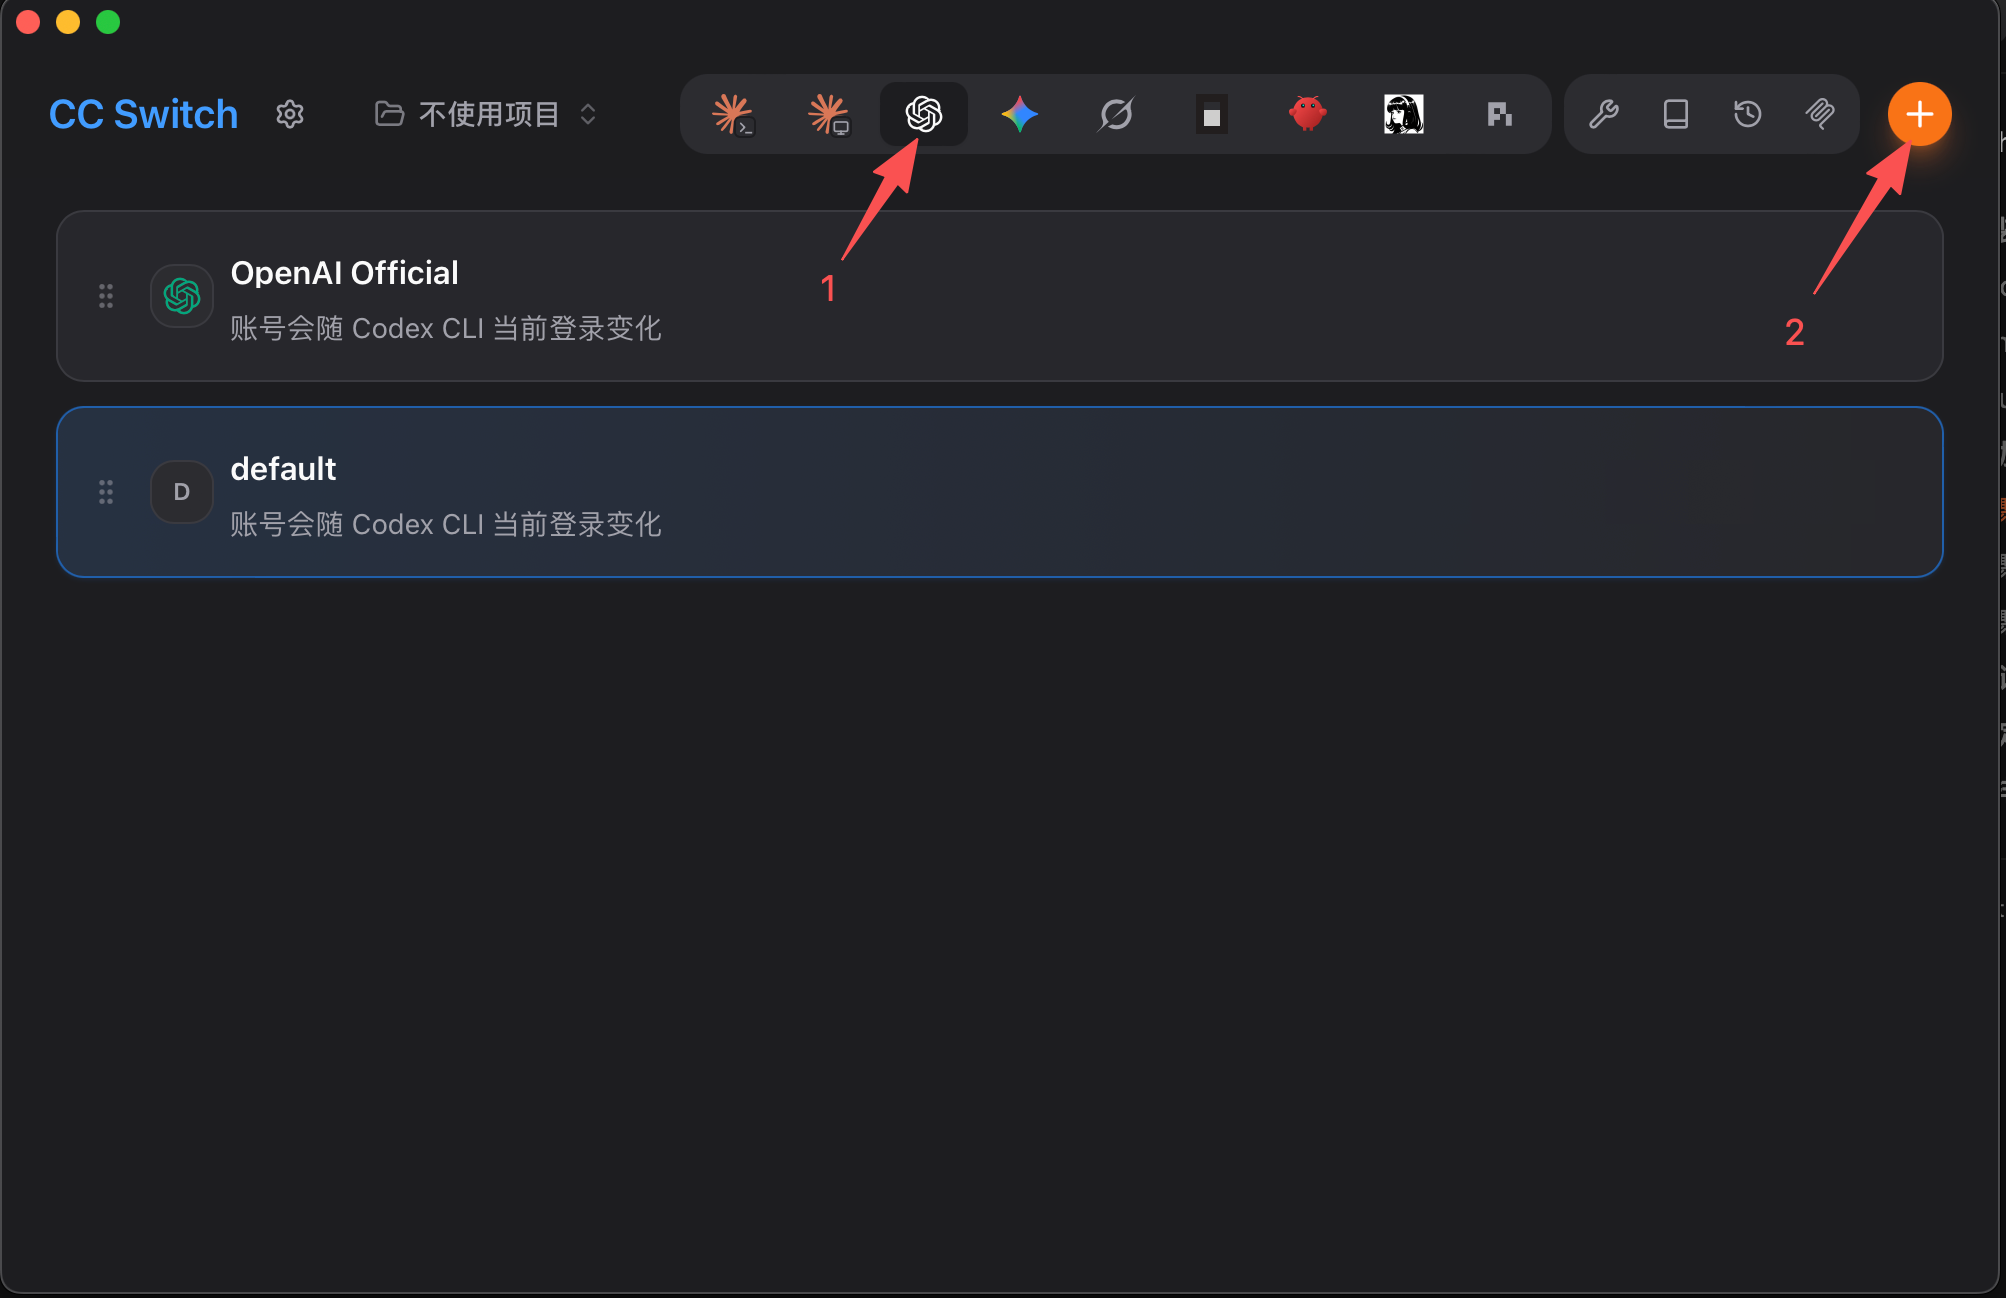
2. Open the Codex provider tab
In CC Switch, select the Codex provider tab, then click the plus button to add a new provider.
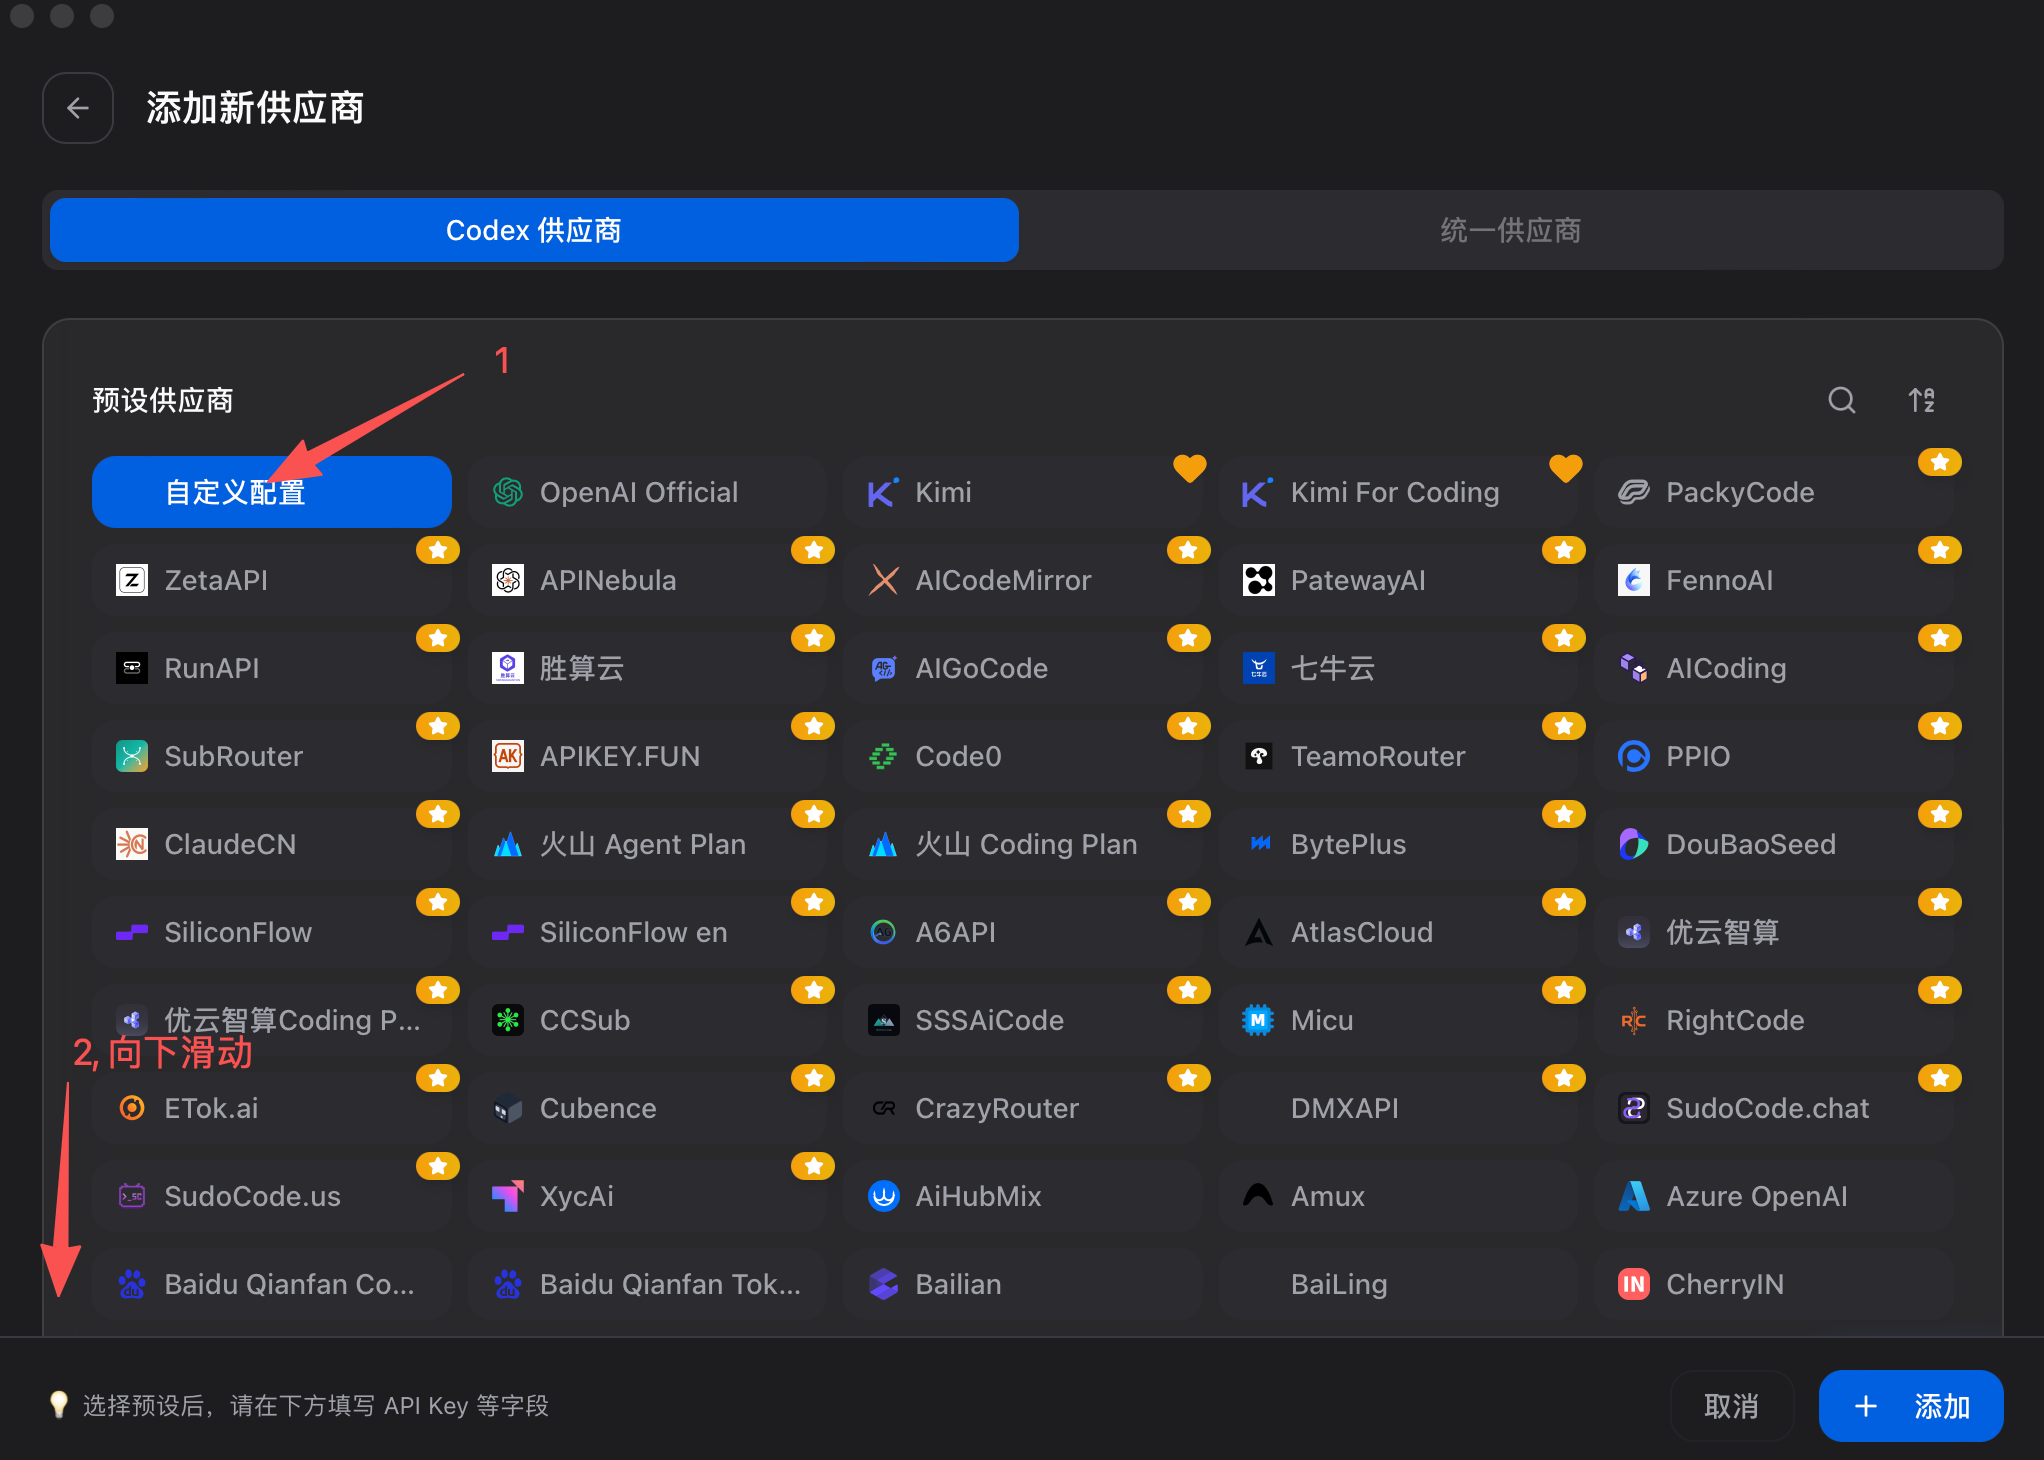
3. Choose custom configuration
On the add provider page, select custom configuration, then scroll down if you need to find it.
4. Fill in the GetAPI provider
Enter a provider name, paste the matching API Key, and fill in the API request address with /v1, such as https://relay-api.getapi.pro/v1.
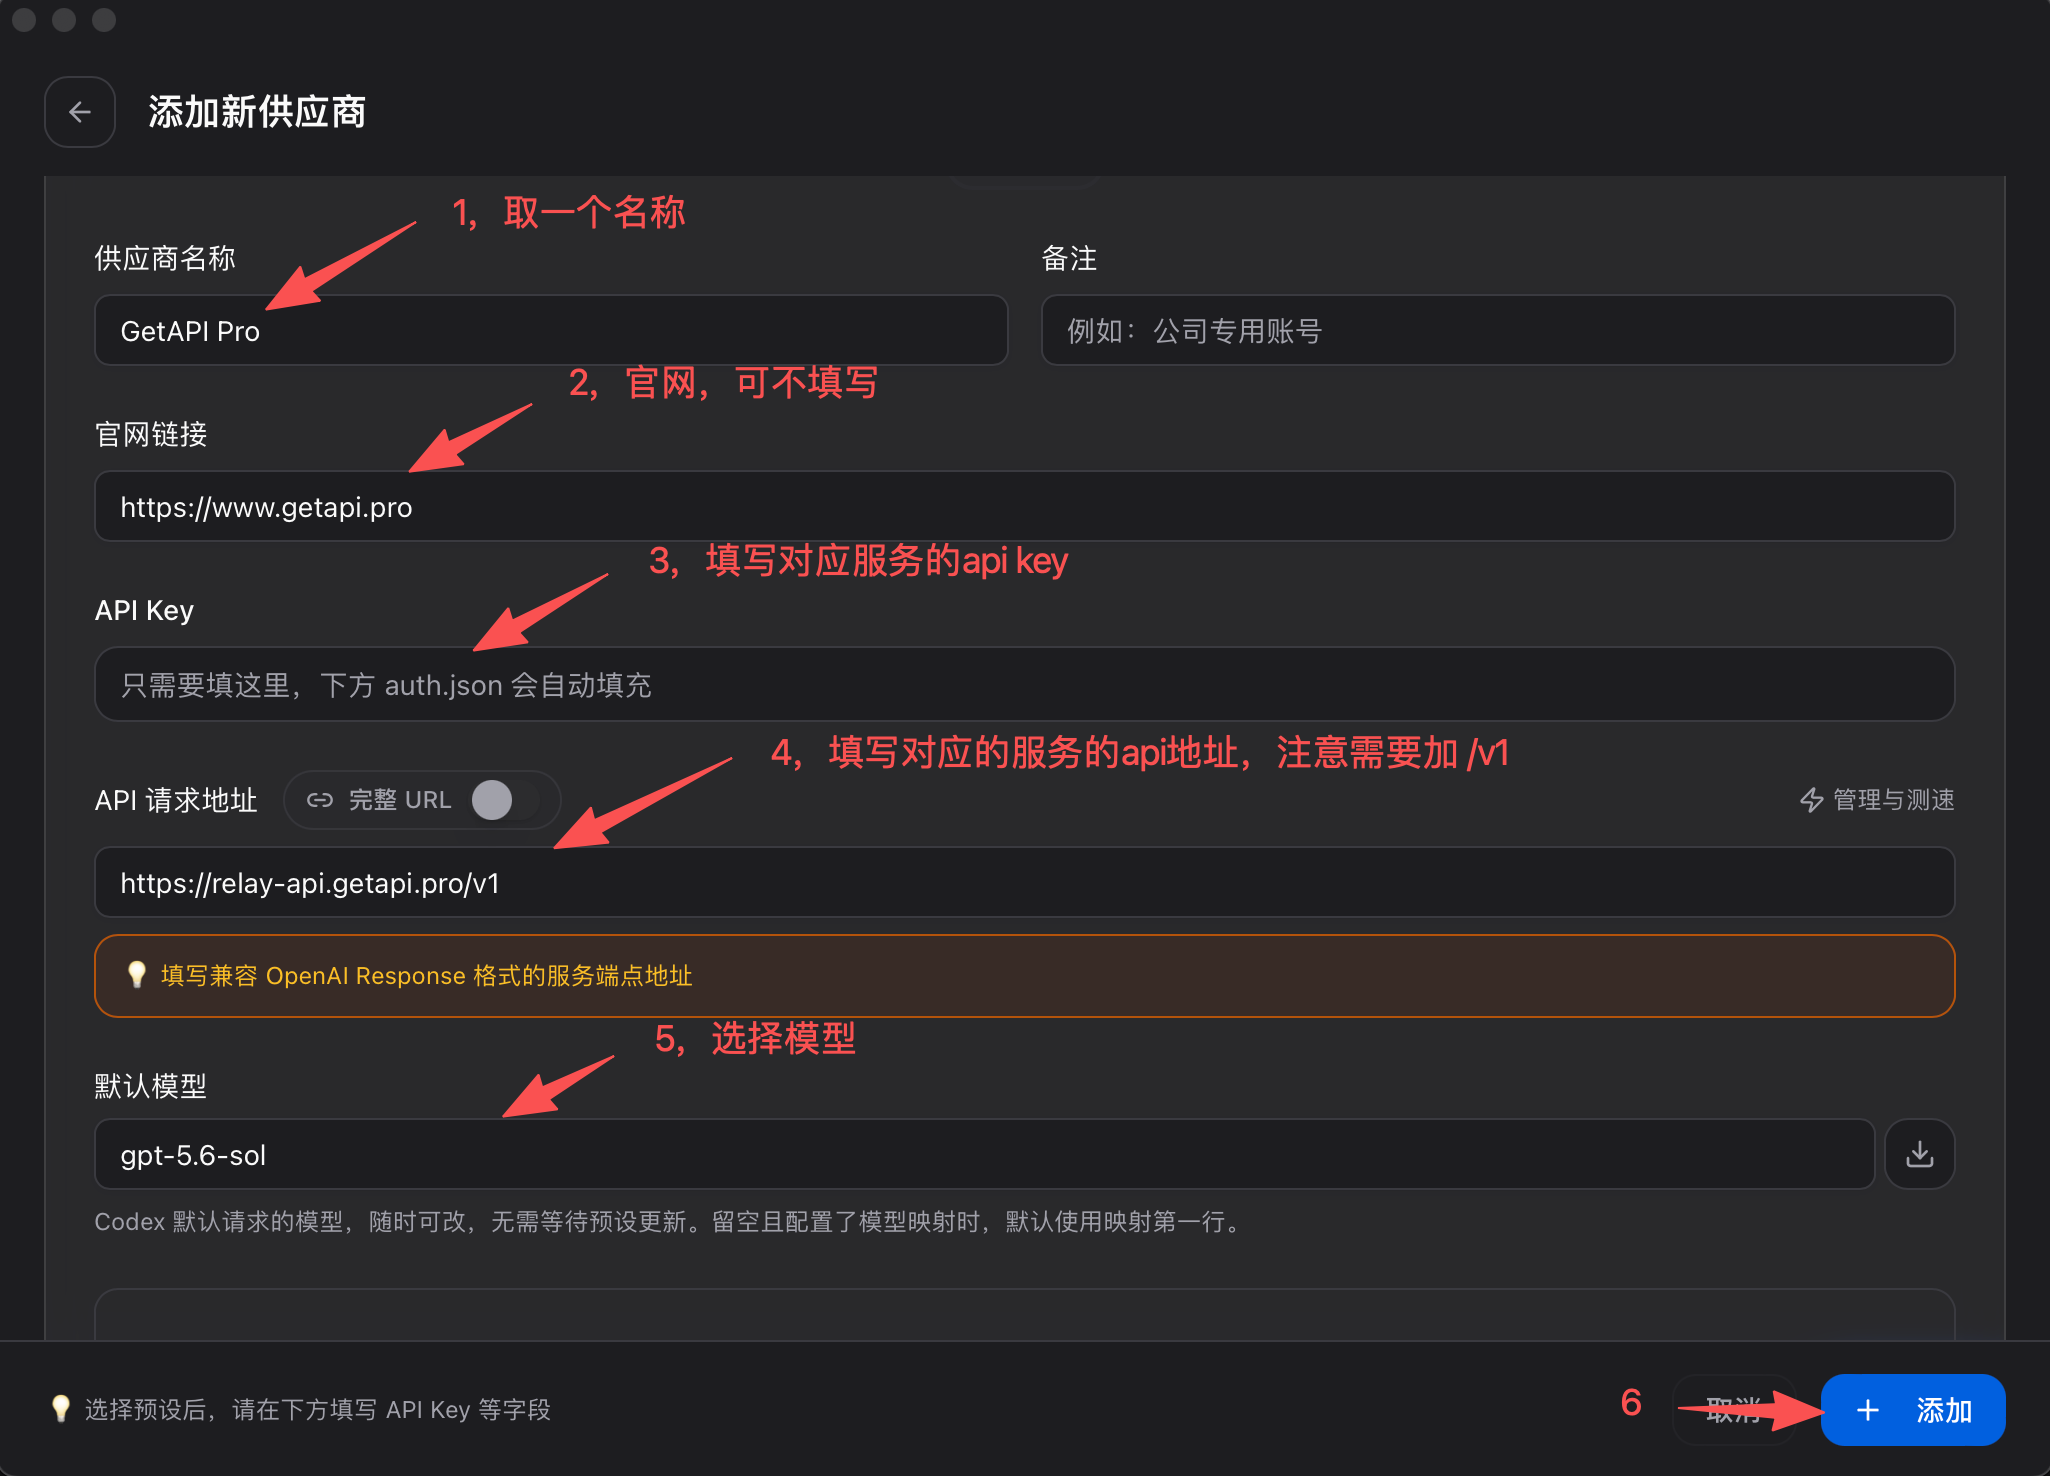
| Configuration item | getapi.pro | getapi.one | Notes |
|---|---|---|---|
| Provider name | GetAPI Pro | GetAPI One | Custom name for recognition. |
| Official website | https://www.getapi.pro | https://www.getapi.one | Provider website. This field can be left blank if CC Switch does not require it. |
| API Key | getapi.pro API Key | getapi.one API Key | Copy the key from the matching service. Do not mix keys and addresses across services. |
| API request address | https://relay-api.getapi.pro/v1 | https://www.getapi.one/v1 | Must include /v1. |
| Default model | For example, gpt-5.6-sol | For example, gpt-5.6-sol | Use a model enabled in the matching GetAPI console. |
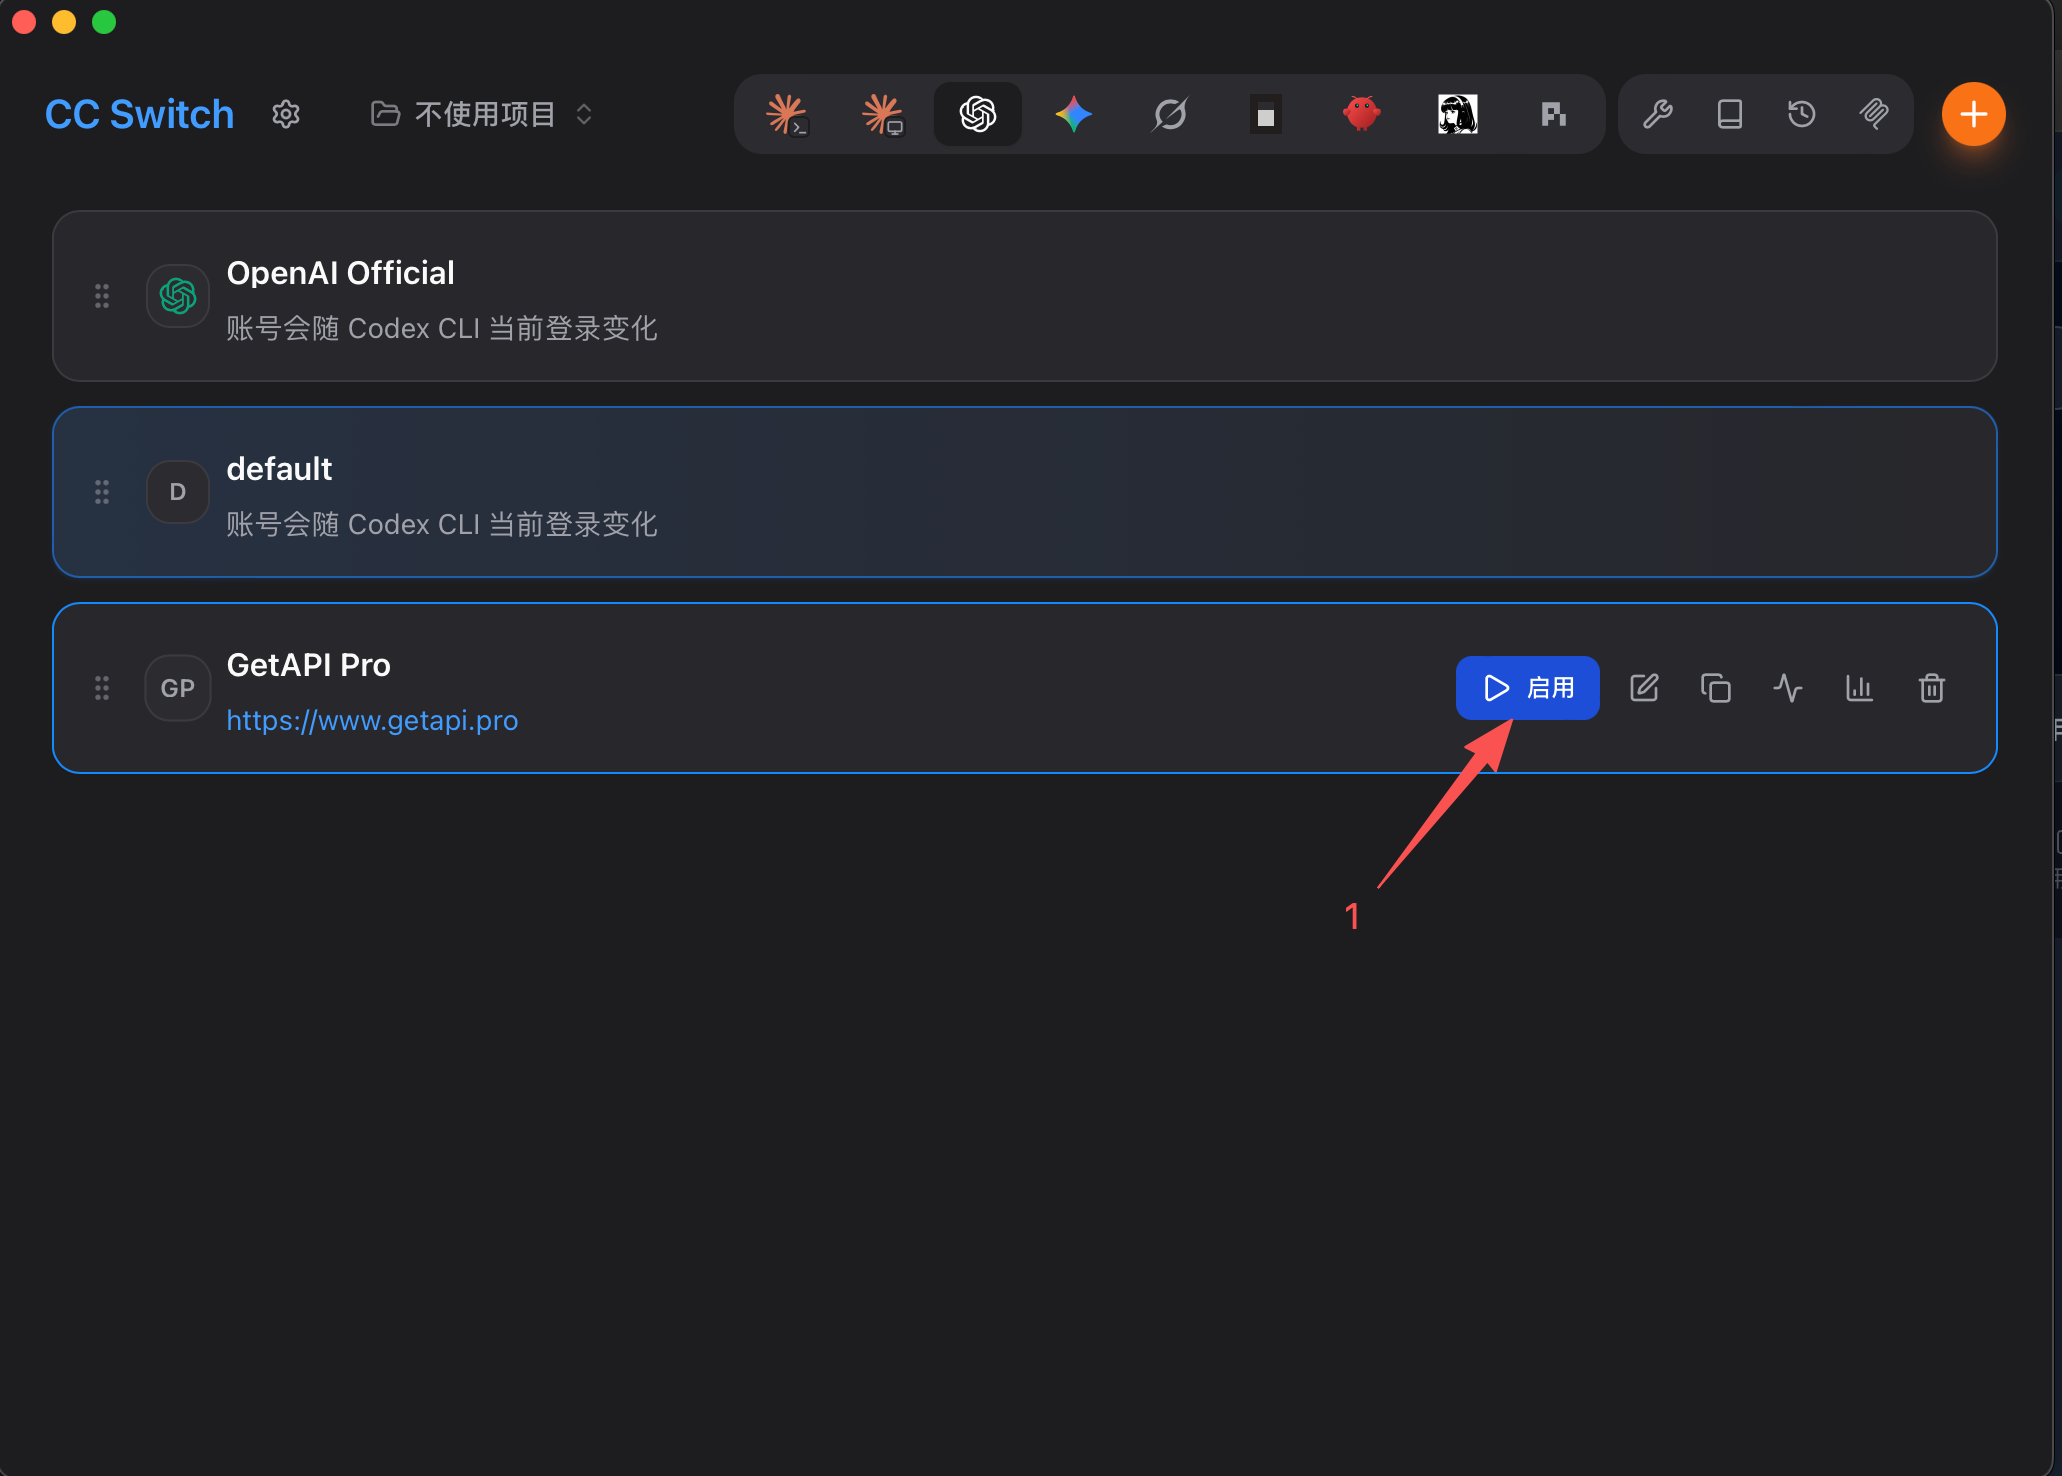
5. Enable the provider
After saving, return to the provider list and enable the GetAPI provider before starting Codex CLI.
Manual config.toml setup
For a CLI-only setup, store keys in environment variables first. Avoid writing API Keys directly into config.toml.
export GETAPI_ONE_API_KEY="sk-..."
export GETAPI_PRO_API_KEY="sk-..."
Then open ~/.codex/config.toml and add both GetAPI providers. Change model_provider to the service you want to use by default.
model_provider = "getapi_pro"
model = "your-model-name"

[model_providers.getapi_one]
name = "GetAPI One"
base_url = "https://www.getapi.one/v1"
env_key = "GETAPI_ONE_API_KEY"
wire_api = "responses"

[model_providers.getapi_pro]
name = "GetAPI Pro"
base_url = "https://relay-api.getapi.pro/v1"
env_key = "GETAPI_PRO_API_KEY"
wire_api = "responses"
Replace your-model-name with the model you enabled in the matching GetAPI console. For GetAPI, keep base_url ending in /v1. If your relay expects a different OpenAI-compatible wire API, adjust the provider settings according to the Codex config reference.
Run Codex CLI
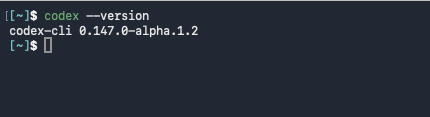
1. Confirm Codex CLI is installed
Run codex --version in the terminal to confirm that the CLI command is available.
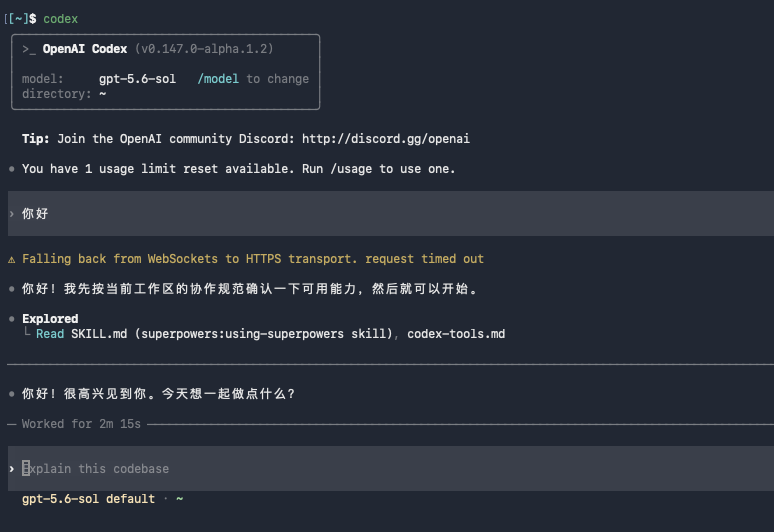
2. Send a test request
Start Codex CLI and send a short message. If Codex returns normally, the CLI provider can be used.
Common issues
| Problem | Possible reason |
|---|---|
| codex: command not found | Codex CLI is not installed, or the install directory is not in PATH. |
| Missing API key | The environment variable named in env_key is not loaded in the current terminal. |
| 401 / Unauthorized | The API Key is incorrect, disabled, or does not match the selected API address. |
| 404 / Not Found | The Base URL is wrong, missing /v1, or the relay does not support the request path used by the CLI. |
| Model not found | The model name is incorrect, or the selected GetAPI group does not enable that model. |
| Config change not applied | The wrong config file was edited, model_provider points to another provider, or the terminal needs to be restarted. |
Security tips
Never paste a real API Key into screenshots, public repositories, frontend code, or shared documents. Use environment variables and mask keys before sharing terminal output.
References
OpenAI official documentation provides the Codex CLI installation, authentication, and configuration reference. CC Switch releases are provided as a convenience download source.